Third in my series of learning Illustrator CS6 was a study of masking. Again, I used a pear for the design element, this time copying my pear from the prior illustration and just modifying the leaf shape slightly. I filled it in with a little gradient and pattern and rotated it. I also added a variable width stroke in gold to the pear and stem. (Love some of these new features that I have missed out on by stopping at CS3.)
But the goal was to fill the shape with something more complex, so I decided to frame my front door with the pear shape and call it Home Sweet Pear.
Using some of the fun tools (available in many prior versions) in Illustrator, like Divide Into Grid I was able to build a copy of my front door and then use blends to create the wooden panels. Divide into Grid also helped create the slats on the hurricane shutters and the squares on the tile entry.
After the little smidgen of landscape that would show was added by creating symbols of leaves and flowers, I copied the shape of the pear to the top of the layer, selected the layer and clicked on the Create Layer Mask Icon at the bottom of the Layer Panel. Presto! All the little edges and things that don't fit get perfectly covered up by the pear shape! (I love masks - in Illustrator and Photoshop they give you such beautiful results and make jobs that would be difficult so simple.) Rotated the view to match the pear's rotation. Then created a little sunshine and clouds for the leaf and masked them in the same way.
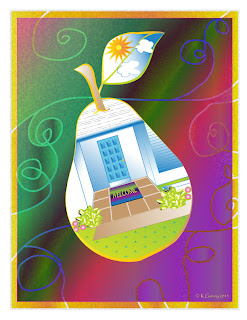
Things are still easily added into the clipping mask just by dragging them into that layer so I built a welcome mat, and dragged it to the pear layer.
Added a background of rectangles filled with gradients and cut them up with the knife tool.
Next, tackling Mesh!


 Things are still easily added into the clipping mask just by dragging them into that layer so I built a welcome mat, and dragged it to the pear layer.


No comments:
Post a Comment